
For CODING public cloud users migrating to Zadig private deployment, we have compiled this guide based on the practical experience of our first batch of users. The guide covers the entire process from prerequisite configuration, Zadig installation and deployment to application hosting, providing reusable operational frameworks and tool support. We recommend technical teams prioritize following this guide for autonomous migration execution. Any issues encountered during the process can be synchronized in the community, and we will continuously optimize the guide content based on feedback.
# Prerequisites
- Choose an enterprise-controlled code repository such as GitLab and complete source code migration
- Organize build configurations from CODING "Continuous Integration" for backup
- Organize service templates from CODING "Continuous Deployment" for backup
- Install Zadig: Using Helm Tool | Zadig Documentation (opens new window)
# Phase 1: Host Existing Applications, Non-intrusive Quick Access to Zadig
Zadig Hosting Service: Zero intrusion, zero restart, worry-free business upgrade!
🚀 No need to transform existing services: Zadig uses non-intrusive hosting, seamlessly integrating with existing architectures.
⏱️ Continuous service online: Zero restart throughout the hosting process, business traffic remains unaffected.
Here's a brief introduction to how Zadig takes over CODING applications and environments:
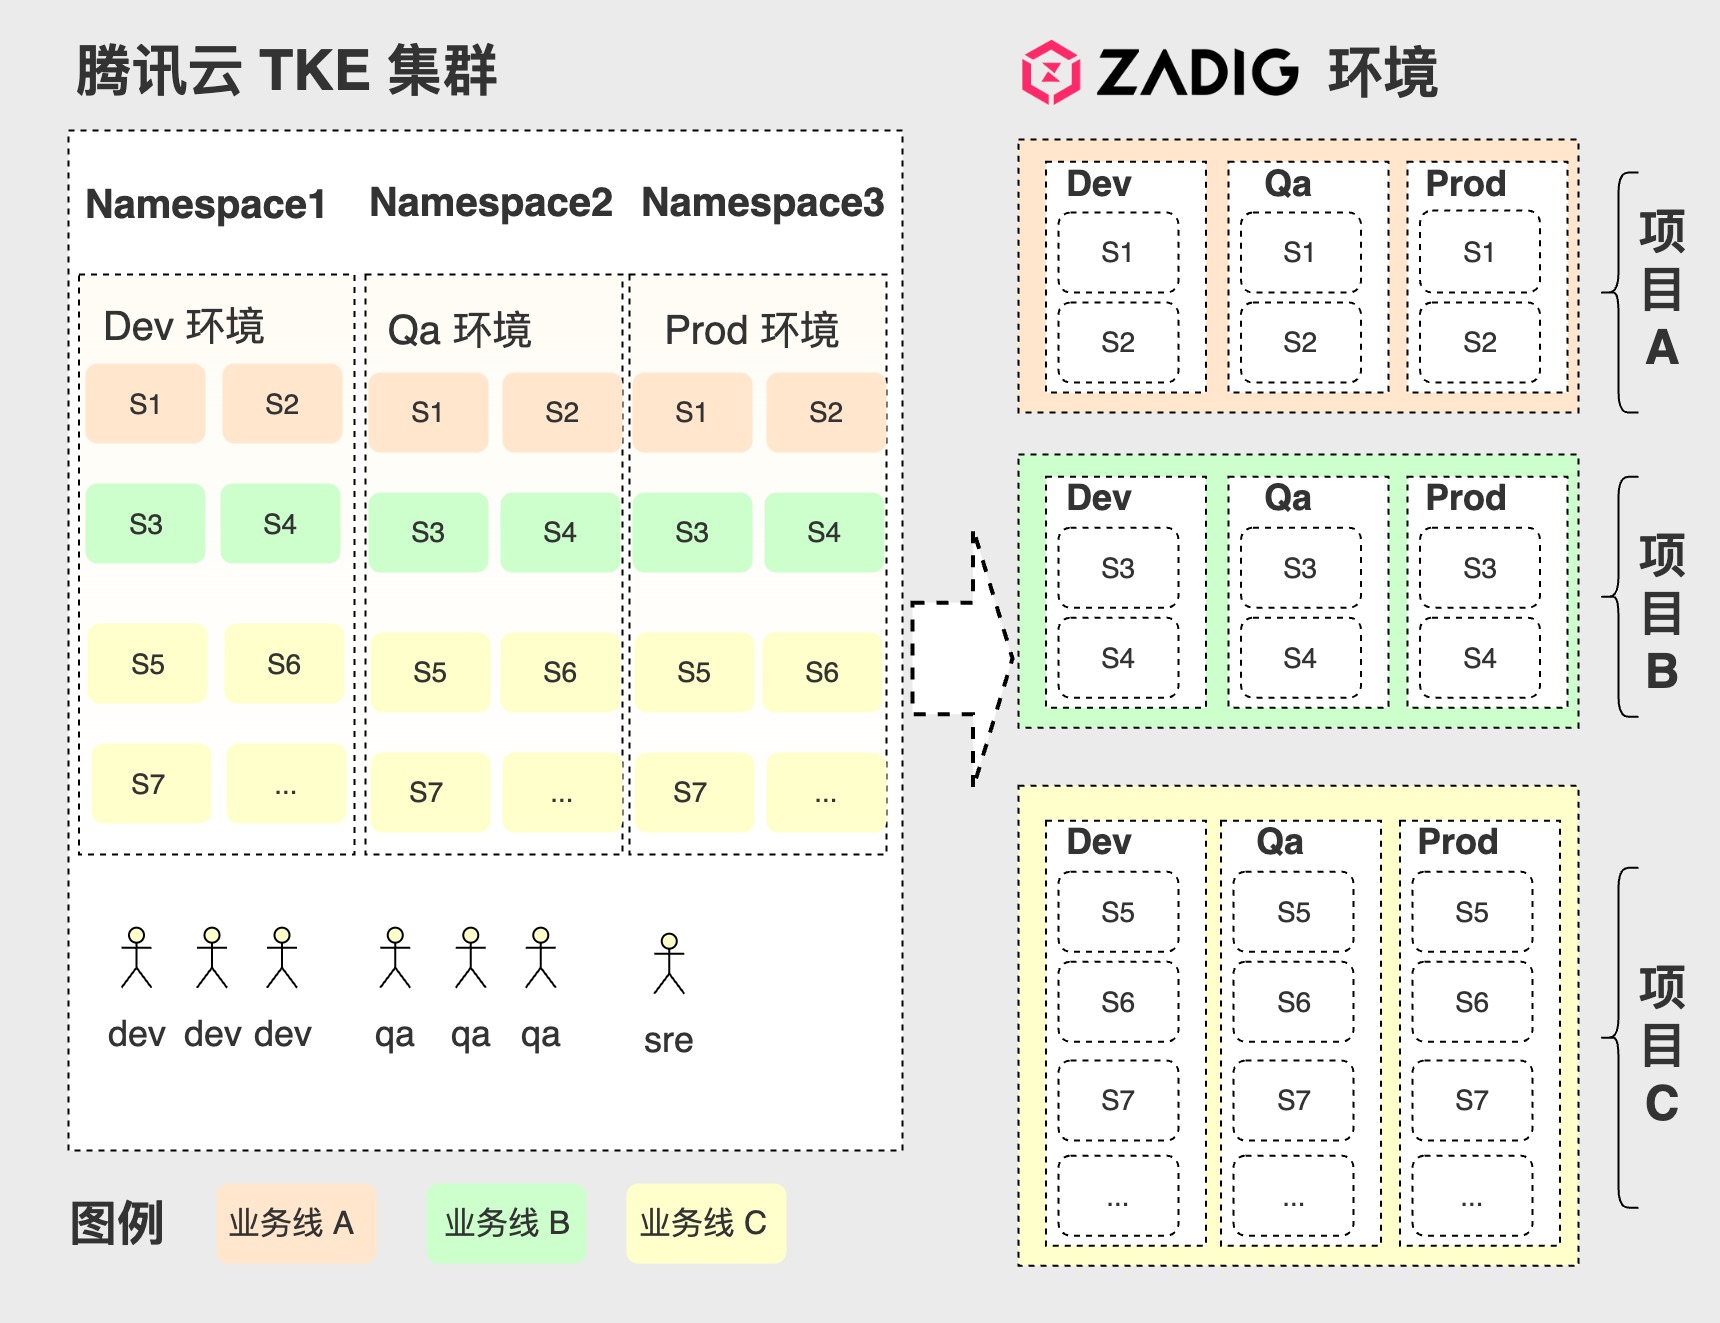
# Administrator Migration of CODING Projects to Zadig
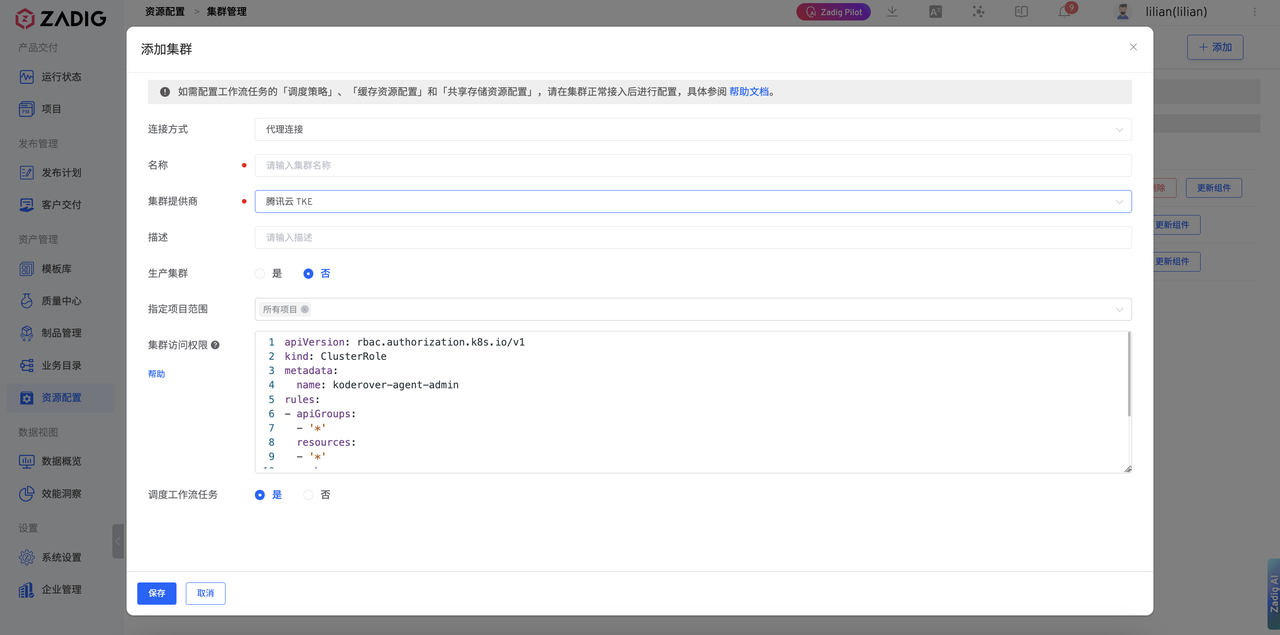
# Step 1: Configure Integration with Tencent Cloud TKE K8s Cluster
Integrate existing K8s clusters into the Zadig system
Click Resource Configuration -> Cluster Management, add cluster:
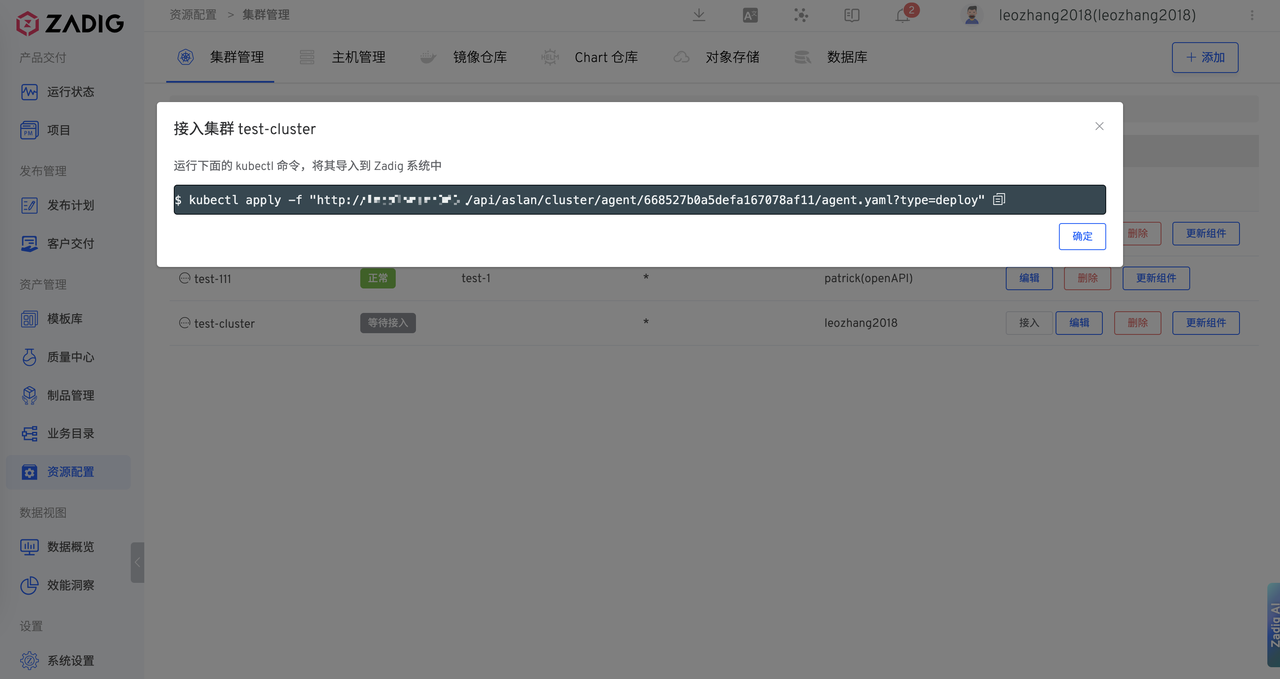
Execute Agent installation script
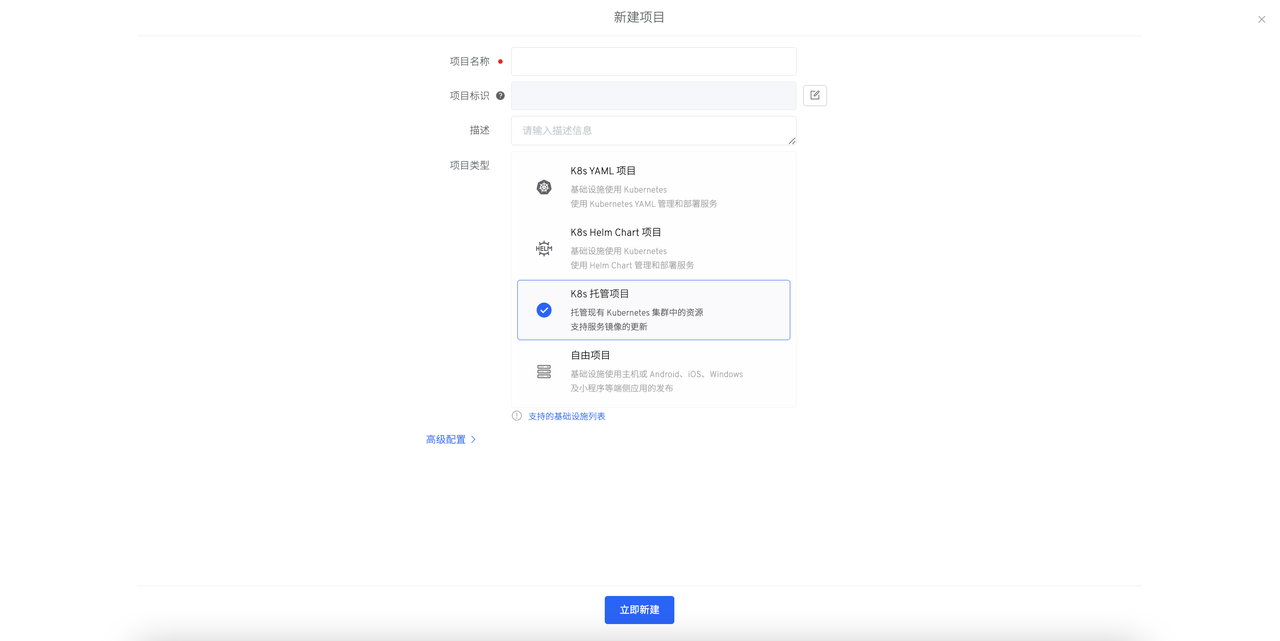
# Step 2: Create Hosting Project
- Create a new project, select
K8s Hosting Project.
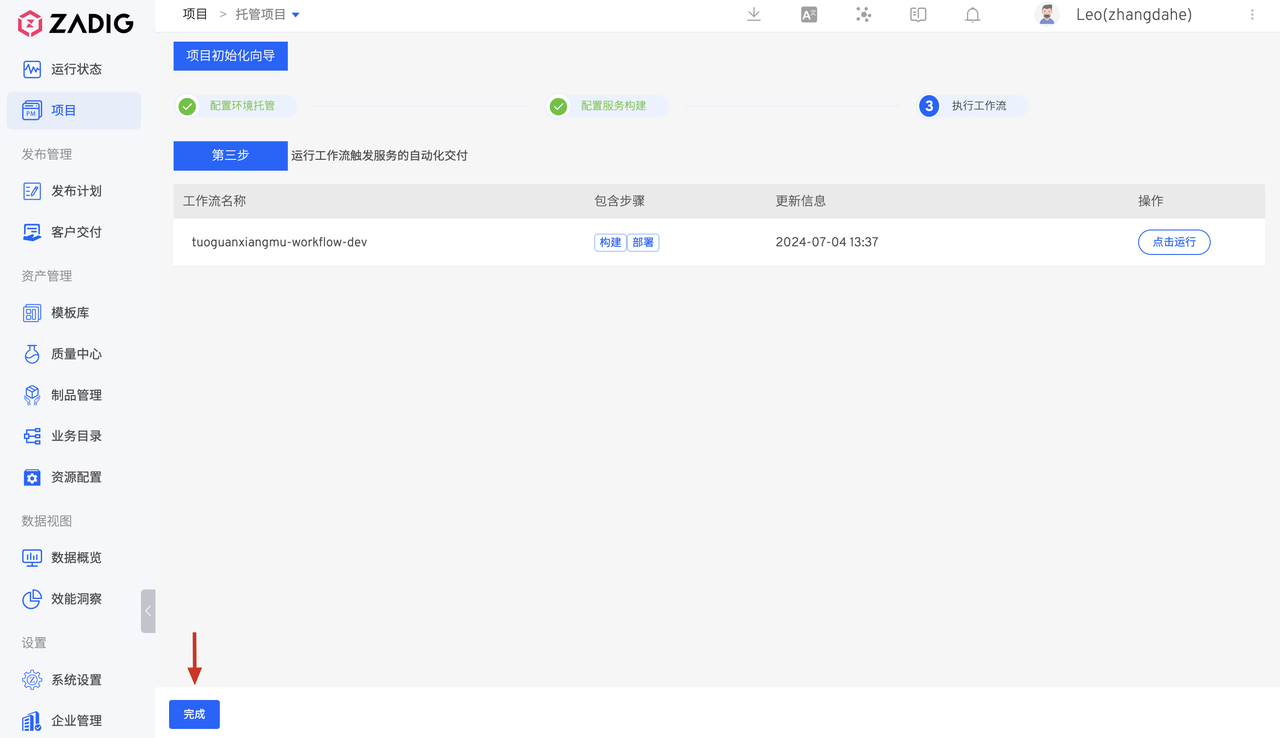
# Step 3: Configure Integration Environment as Needed
# Create Dev Environment
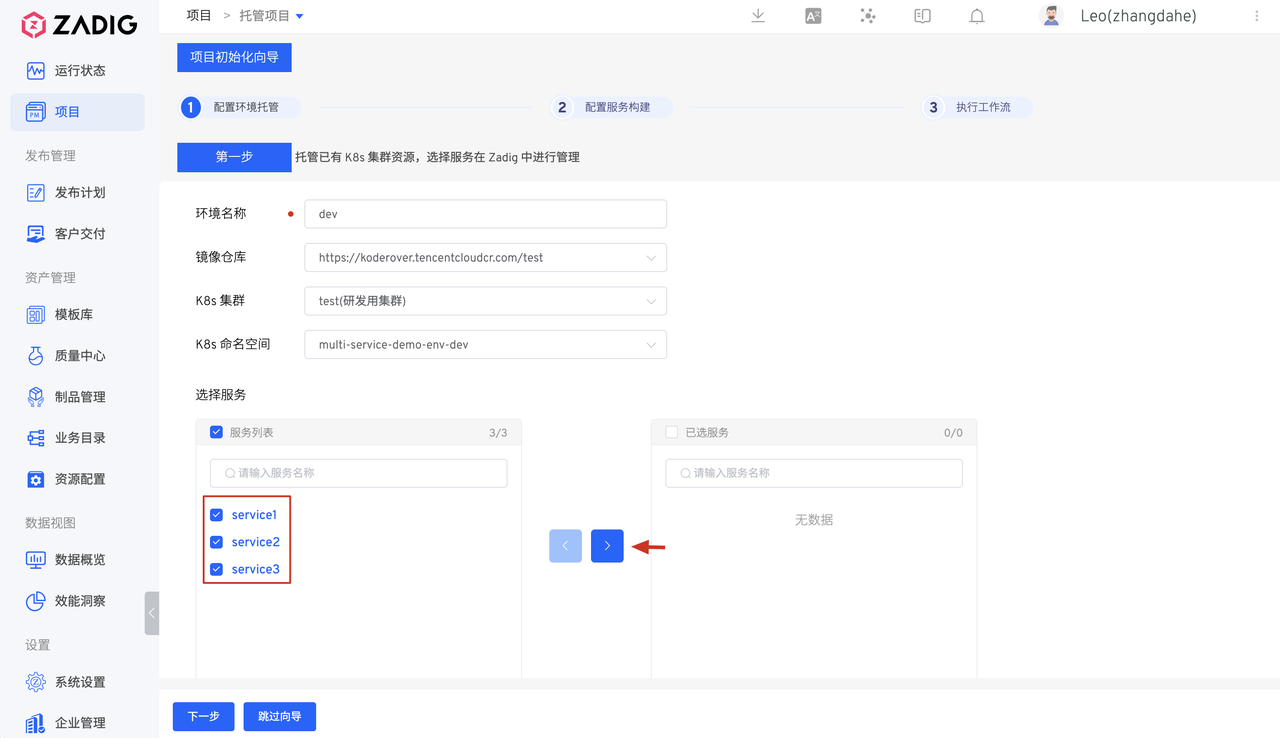
- Set target environment name: dev, select the K8s cluster and namespace to be hosted
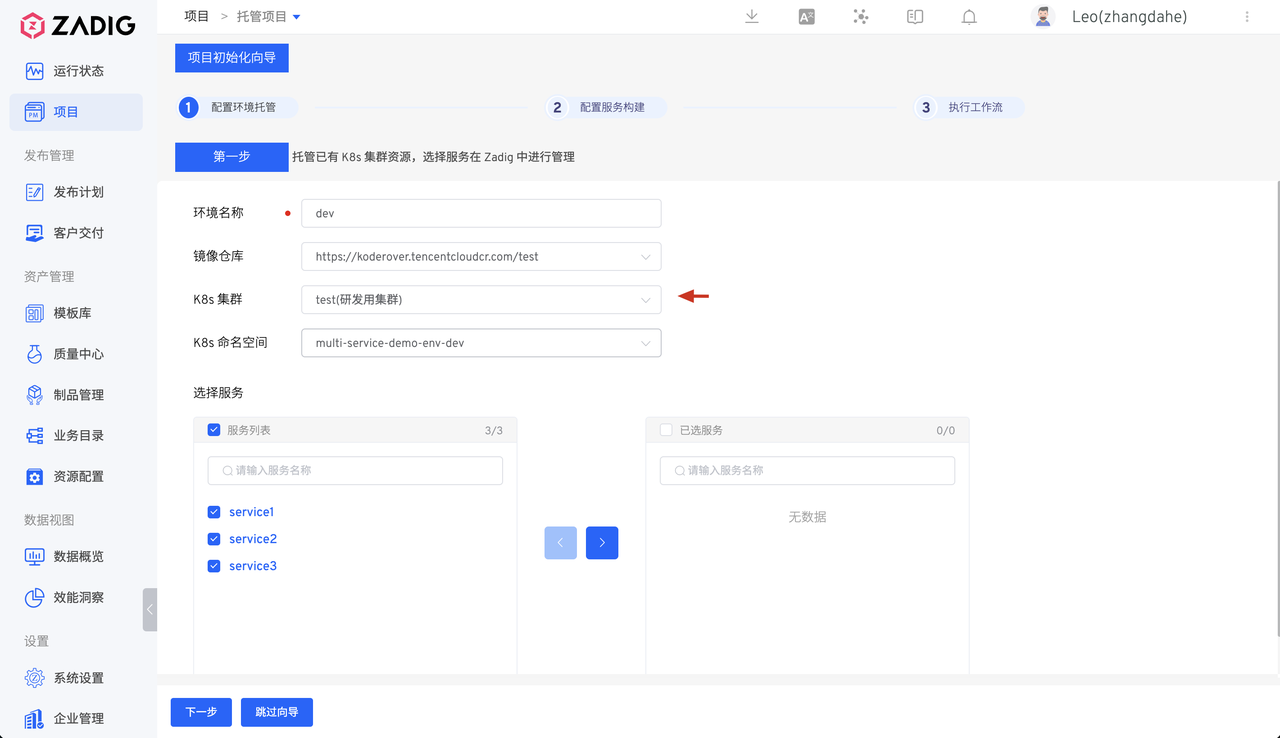
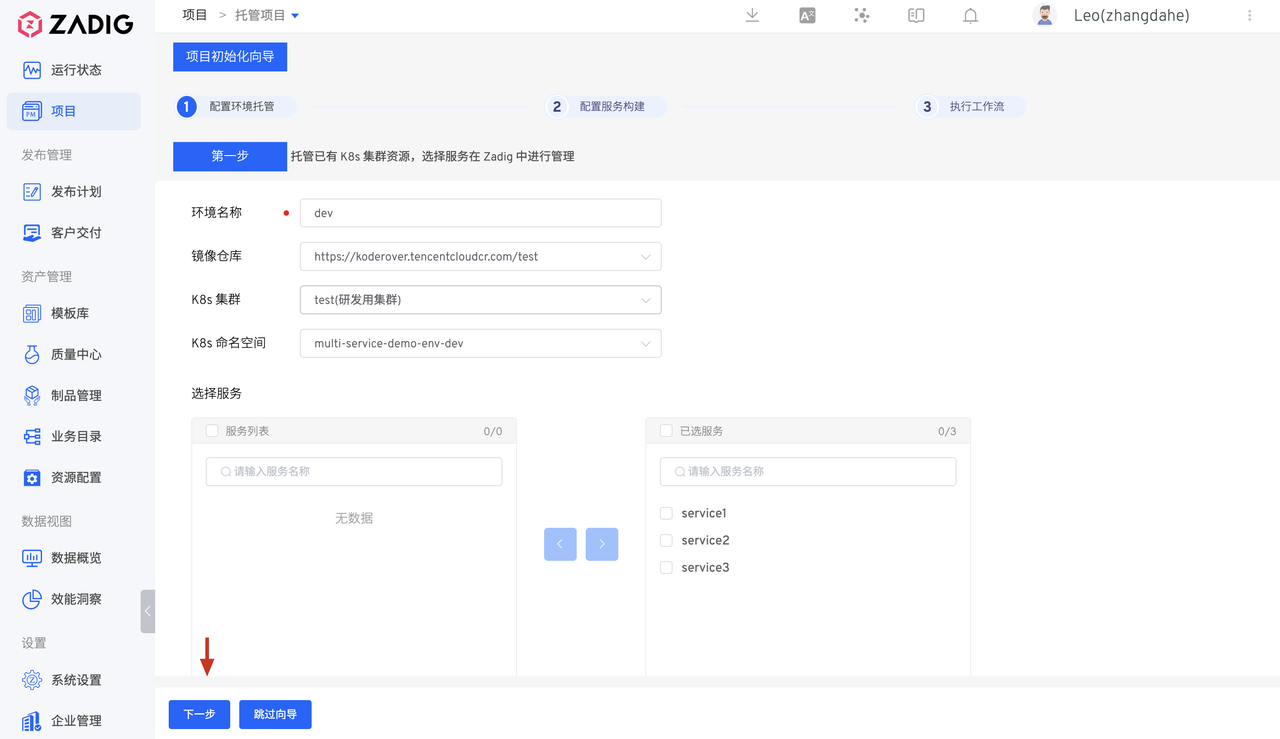
- After selecting the services to be hosted and managed, click Next.
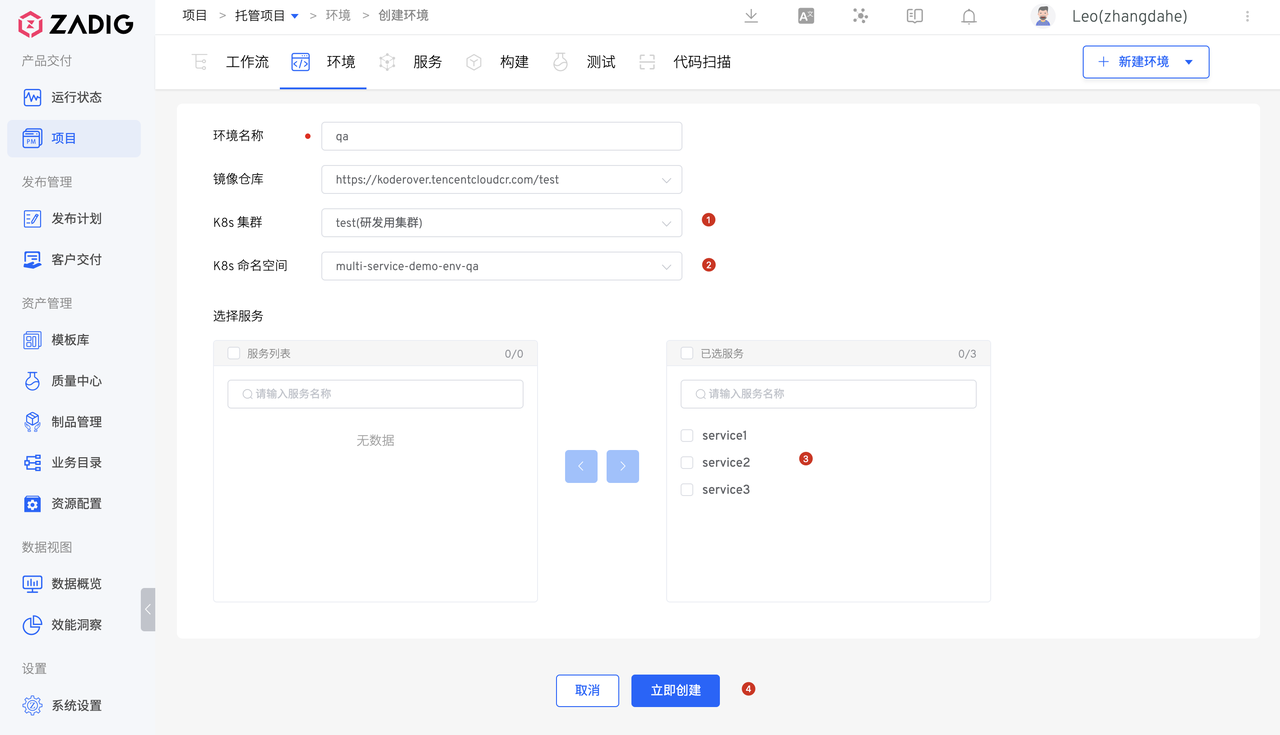
# Create QA Environment
Enter the environment, click Create New Environment
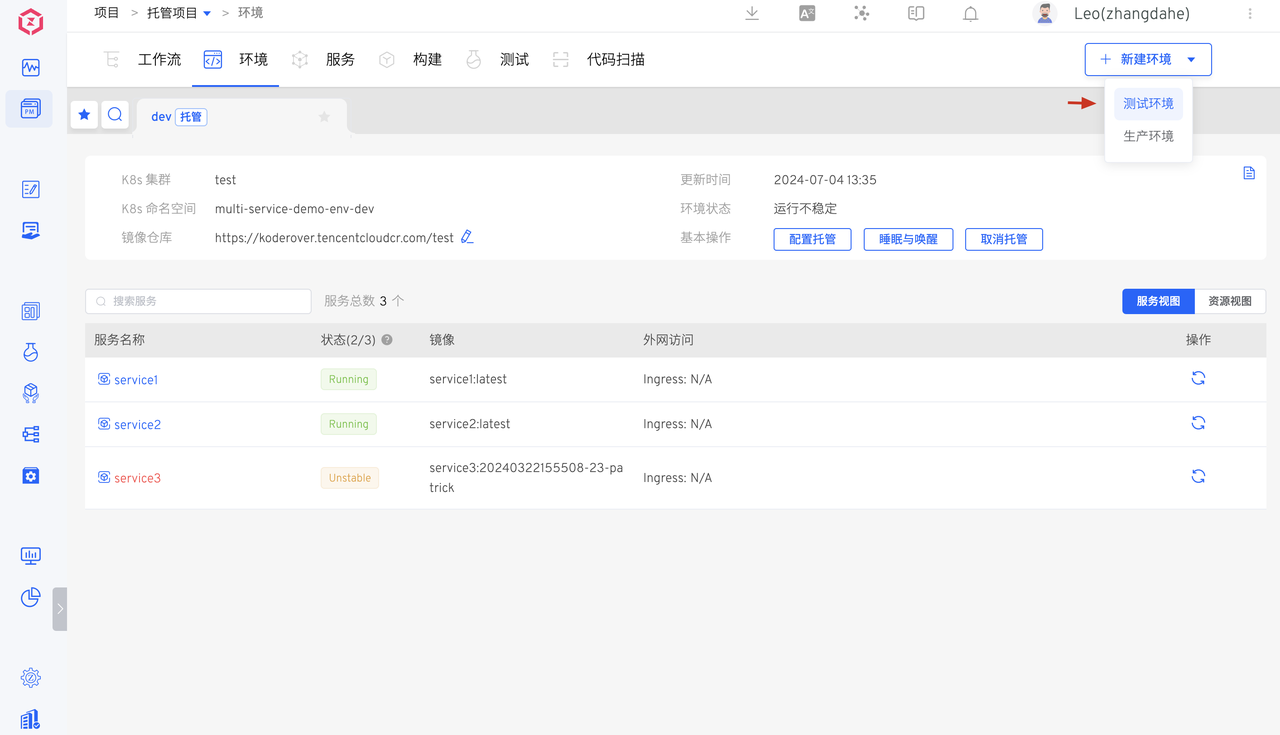
Set environment name: qa, select K8s cluster and namespace

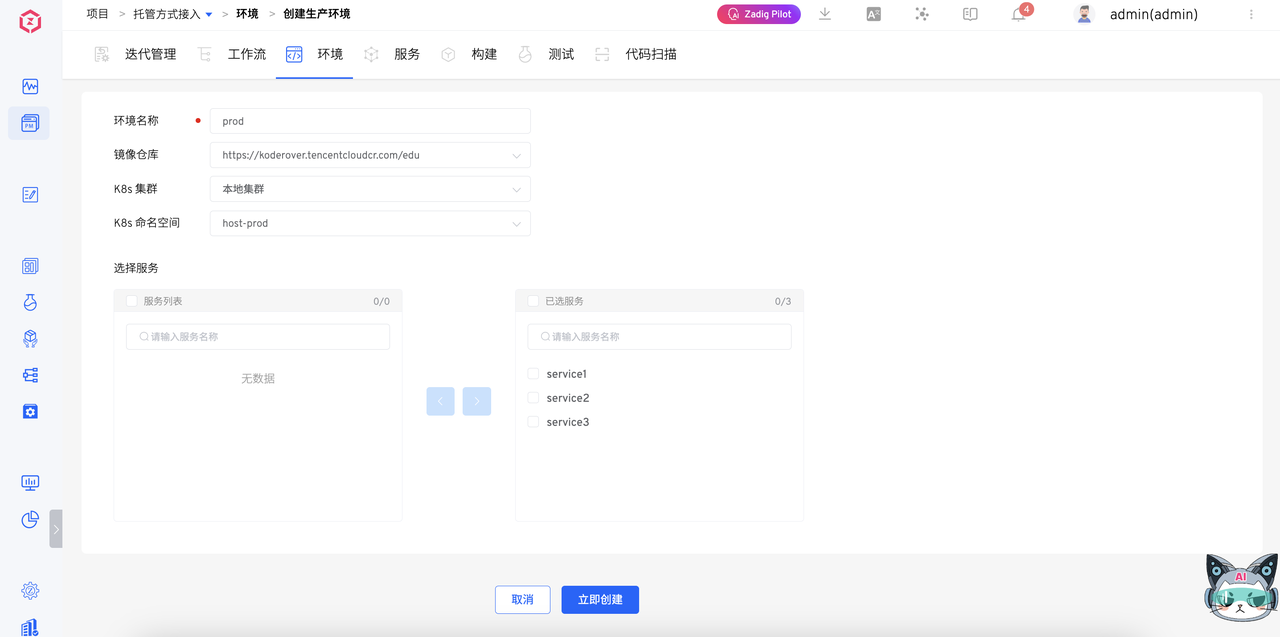
# Create Prod Environment
Enter the environment, click Create New Environment
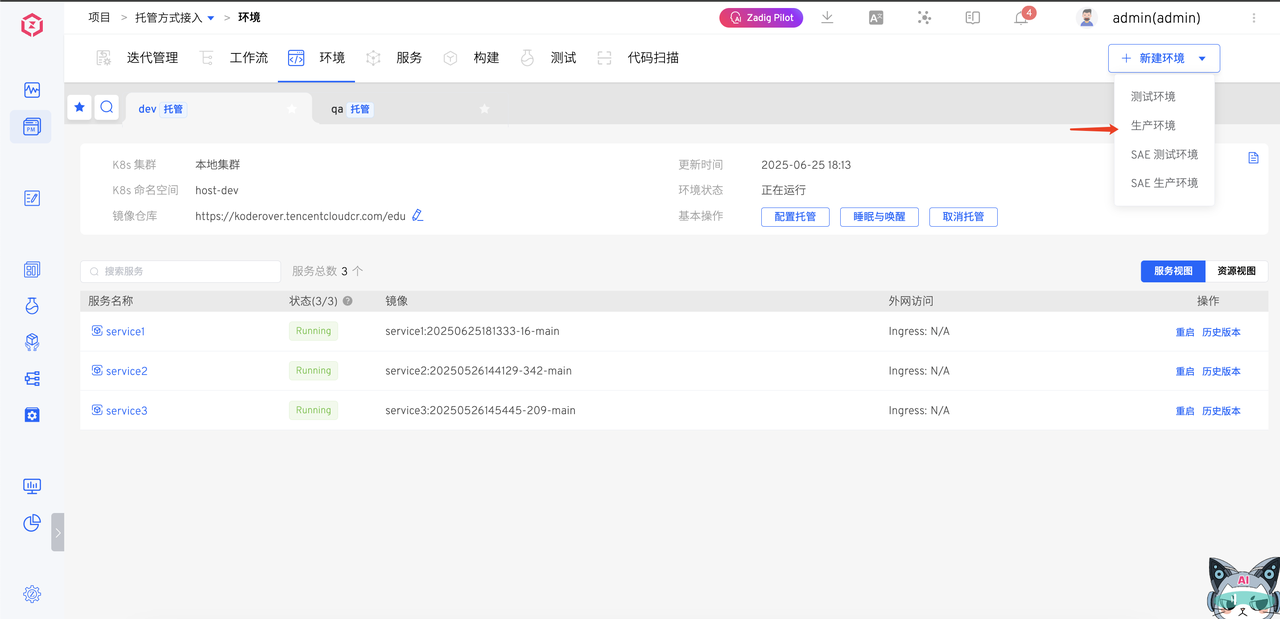
Set environment name: prod, select K8s cluster and namespace
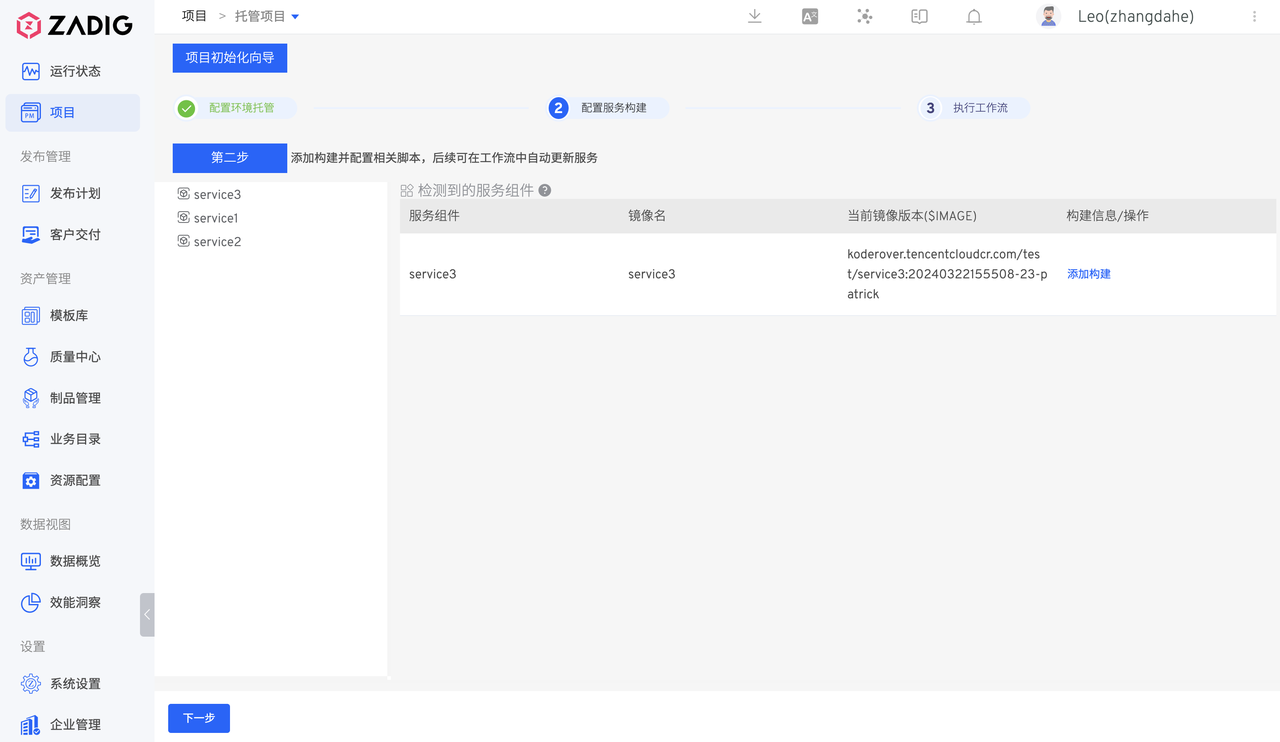
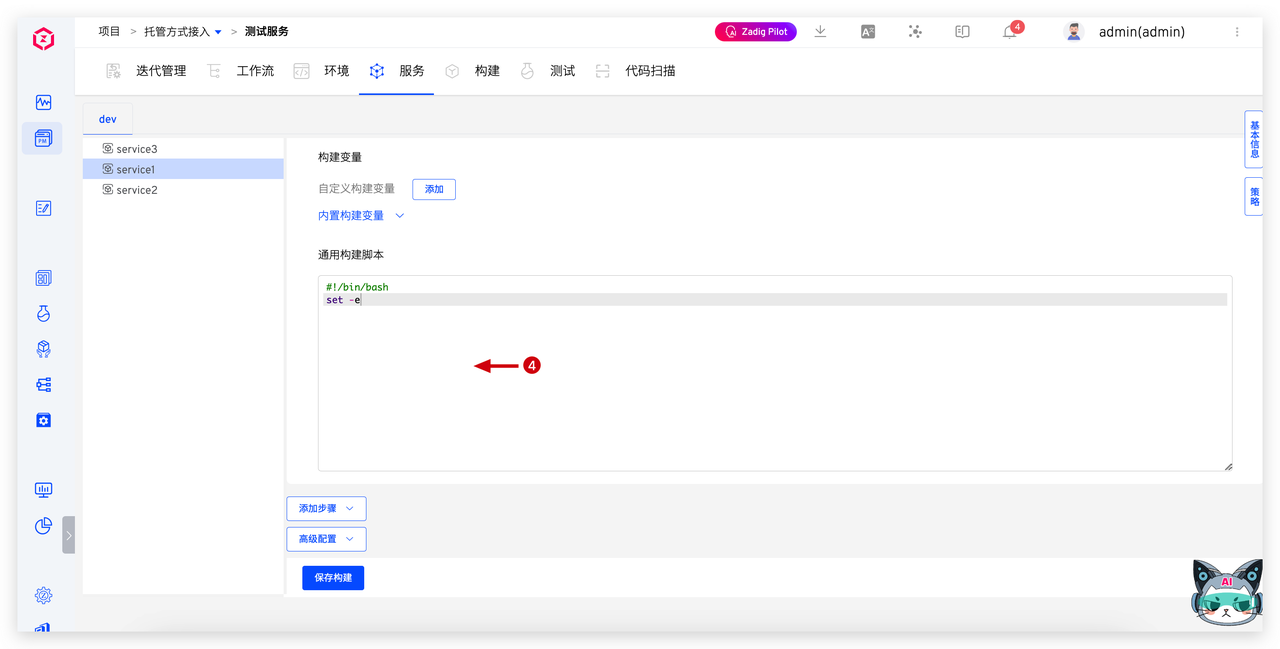
# Step 4: Configure Build and Workflow
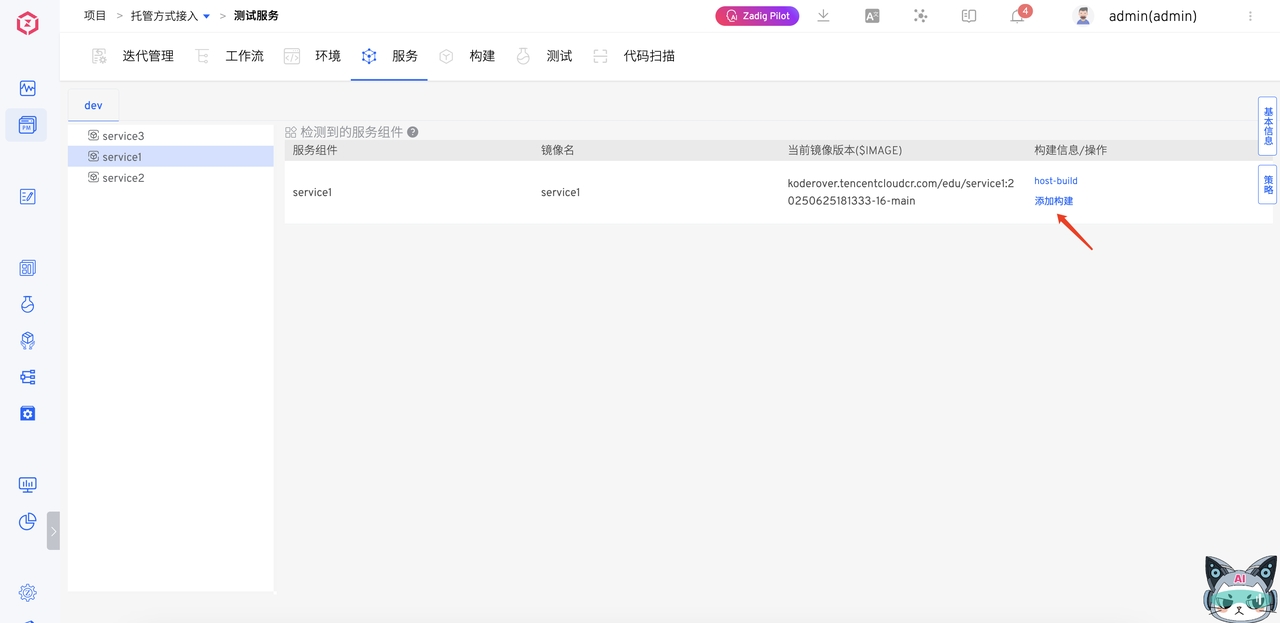
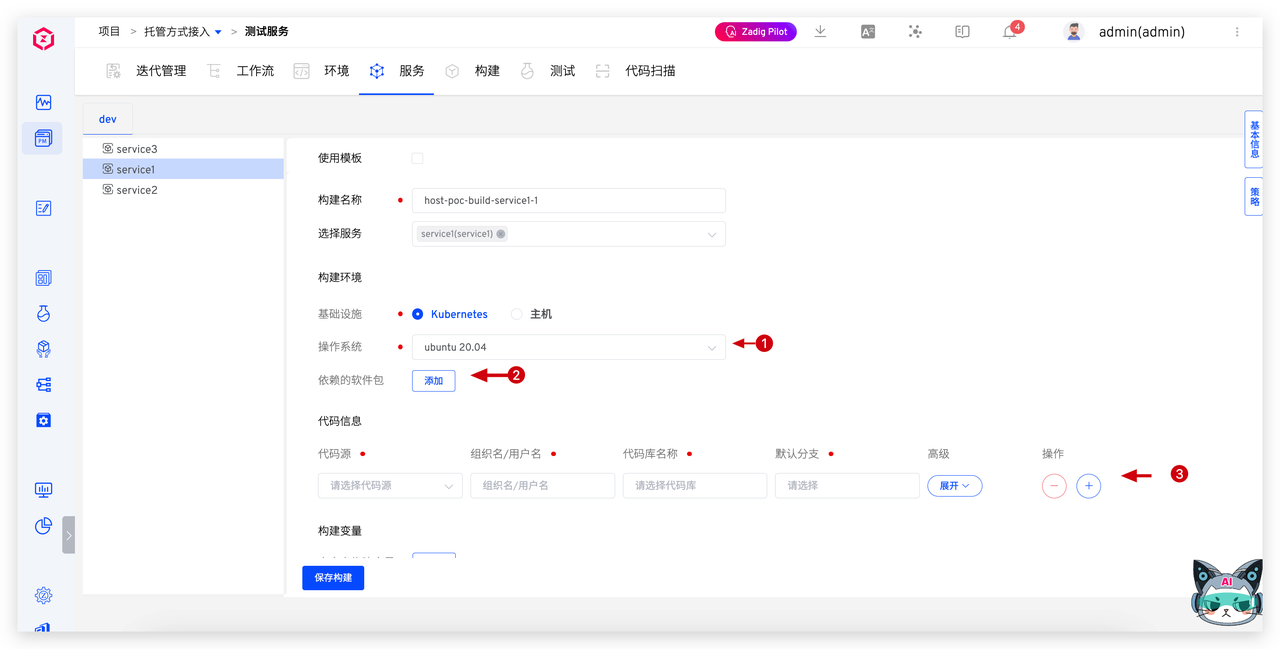
- Add build. Project-Service-Add Build, and configure corresponding service build
Notes:
- [Configure according to actual situation] Custom image: Custom Image Management | Zadig Documentation (opens new window)
- [Configure according to actual situation] Software package dependencies: Package Management | Zadig Documentation (opens new window)
- Code information: Select the corresponding code repository for the service (previously configured GitLab code repository)
- Build script: Use the build configuration from CODING "Continuous Integration"
Advanced configuration reference:
- Build cache configuration: Zadig Build Cache Configuration Guide and Java/Golang/NodeJS Best Practices | KodeRover | Blog (opens new window)
- Build template usage: Zadig Build Techniques Four Lectures: Parallel Build, Template Usage, Multi-service Sharing, Serverless Build | KodeRover | Blog (opens new window)
Configure workflow. Configure development workflow, test workflow, and release workflow. Workflow configuration reference:
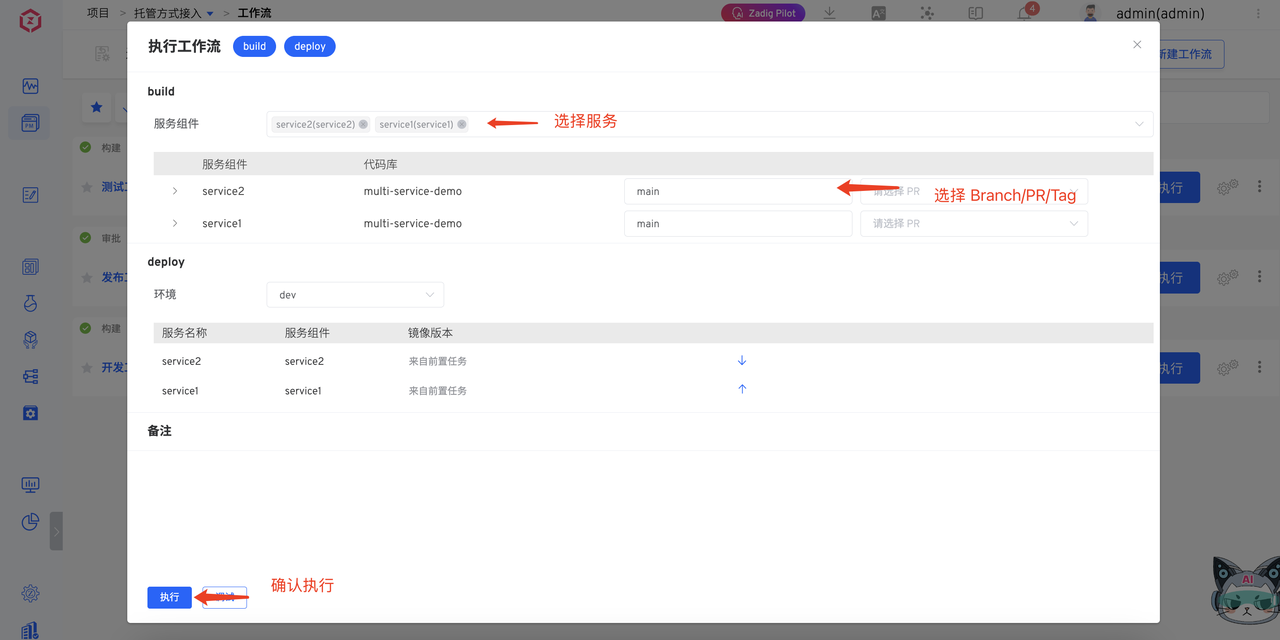
- Development workflow: Build -> Deploy dev
- Test workflow: Build -> Deploy qa
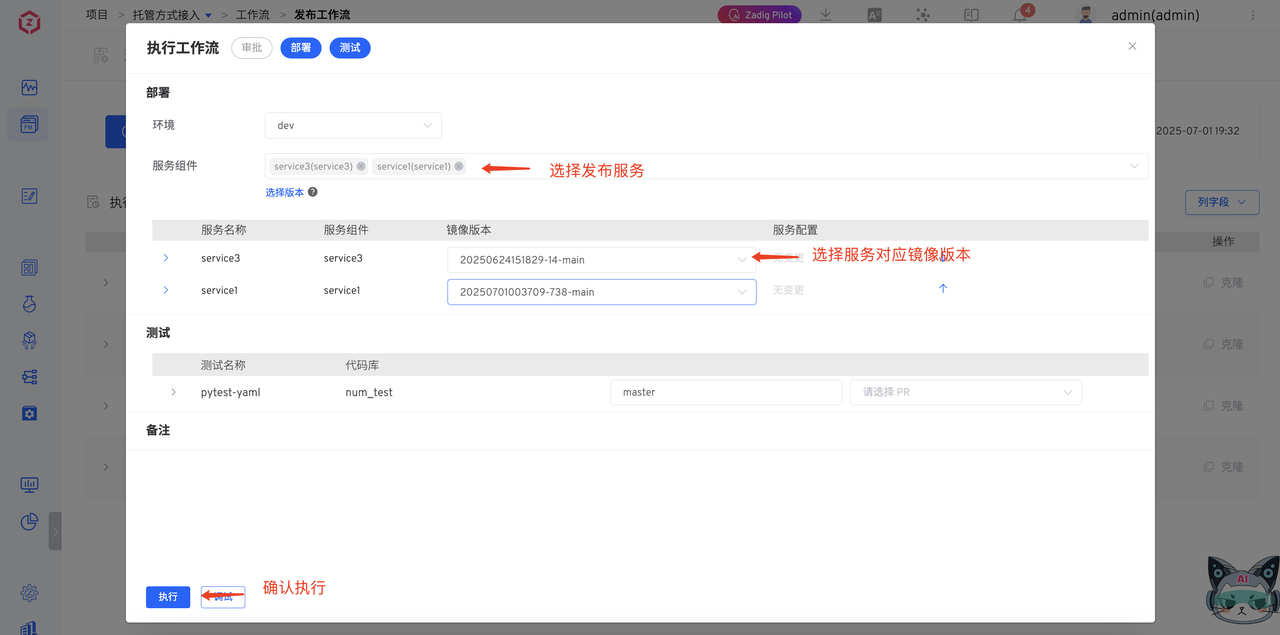
- Release workflow: Deploy prod

Advanced configuration reference:
- Configuration changes, data changes: Change Management | Blog (opens new window)
- Feishu project, approval, notification collaboration: How Zadig Collaborates with Feishu Projects, IM, and Approval | KodeRover | Blog (opens new window)
- DingTalk approval, notification collaboration: Zadig Supports DingTalk Approval and Notification, New Office Collaboration Experience | KodeRover | Blog (opens new window)
- WeCom approval, notification collaboration: Zadig Supports WeCom Approval and Notification, Efficient Collaboration New Experience | KodeRover | Blog (opens new window)
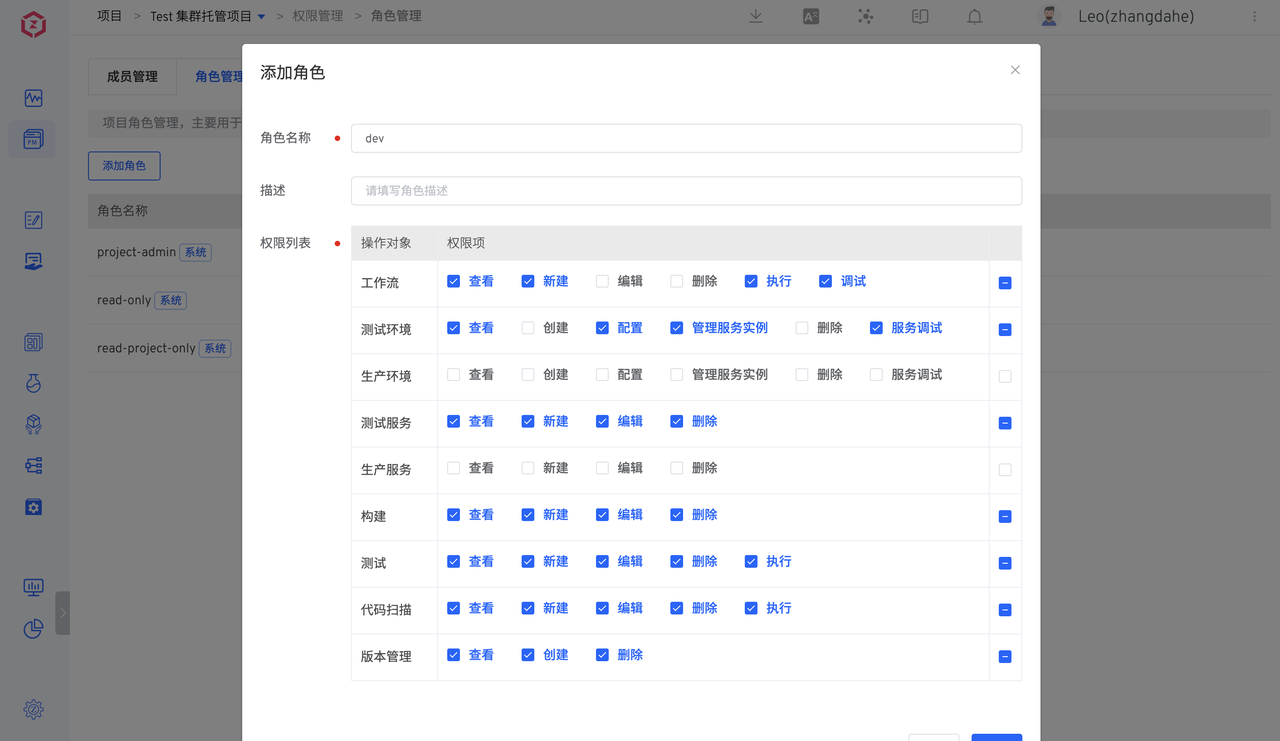
# Step 5: Permission Configuration
Through role permission configuration, project details page click Configuration -> Permissions, you can clearly manage permissions and auditing for different roles
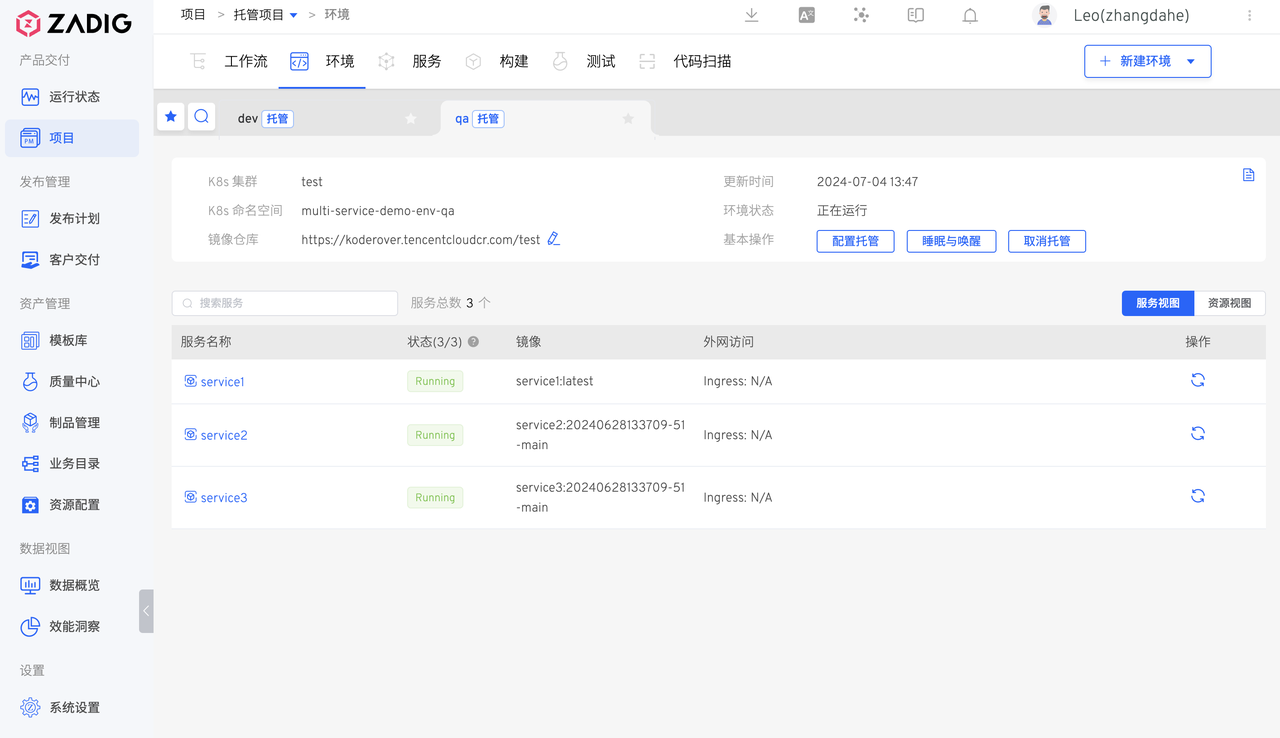
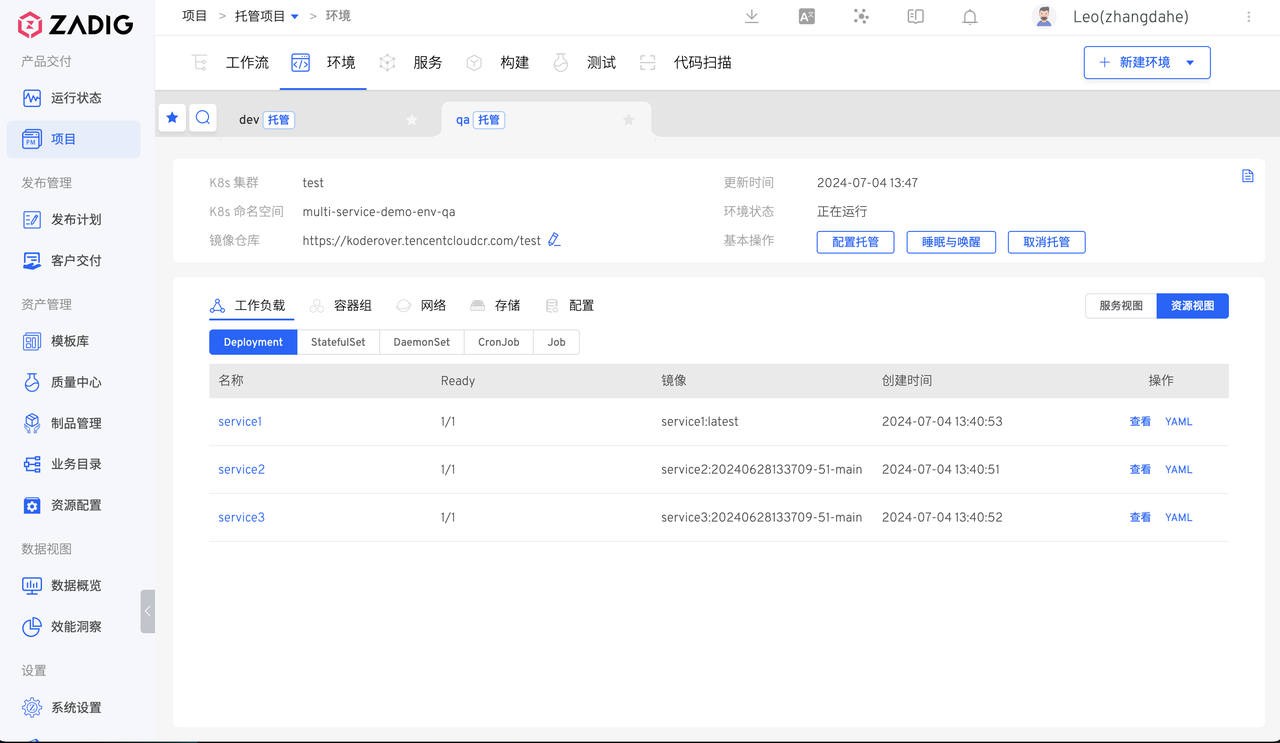
# How Engineers Use Zadig
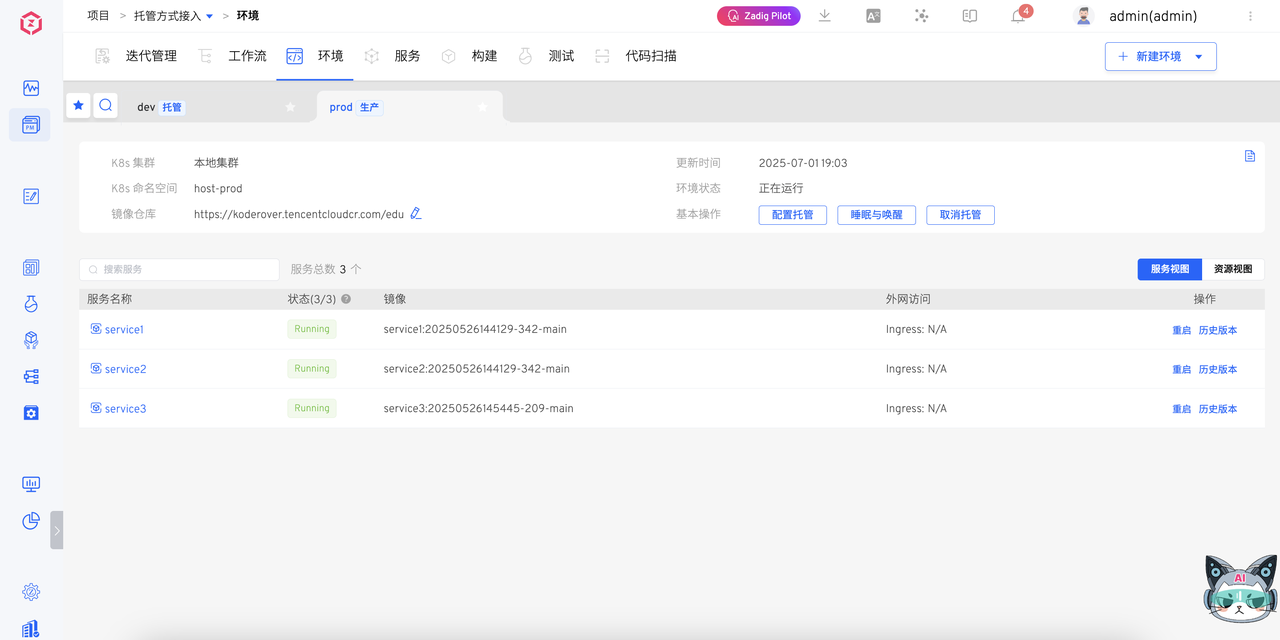
Enter the environment page to view service basic information, service status, and resource information
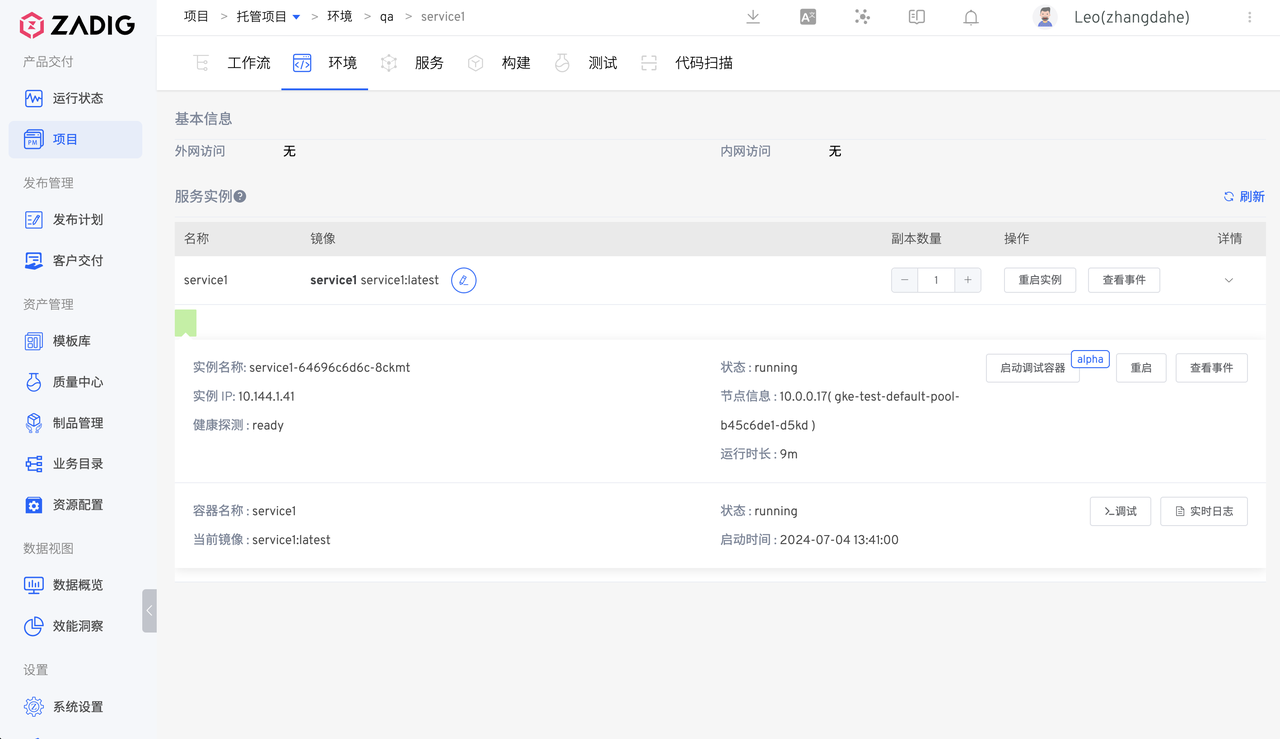
Enter the service details page to view service entry, switch service images, adjust replicas, view real-time logs, log into containers for Pod debugging, etc.

Execute development and test workflows to implement daily changes
Execute release workflows to implement automated production releases
Zadig hosting projects shield the complexity behind clusters, making the organization's business boundaries clearer and more defined, the service update process clear and traceable, and permissions effectively managed. Front-line developers gain a smooth software development experience through Zadig integration, allowing them to focus more on innovation and business iteration.
# Phase 2: From Hosting to Full Management, Application Lifecycle Management on Zadig
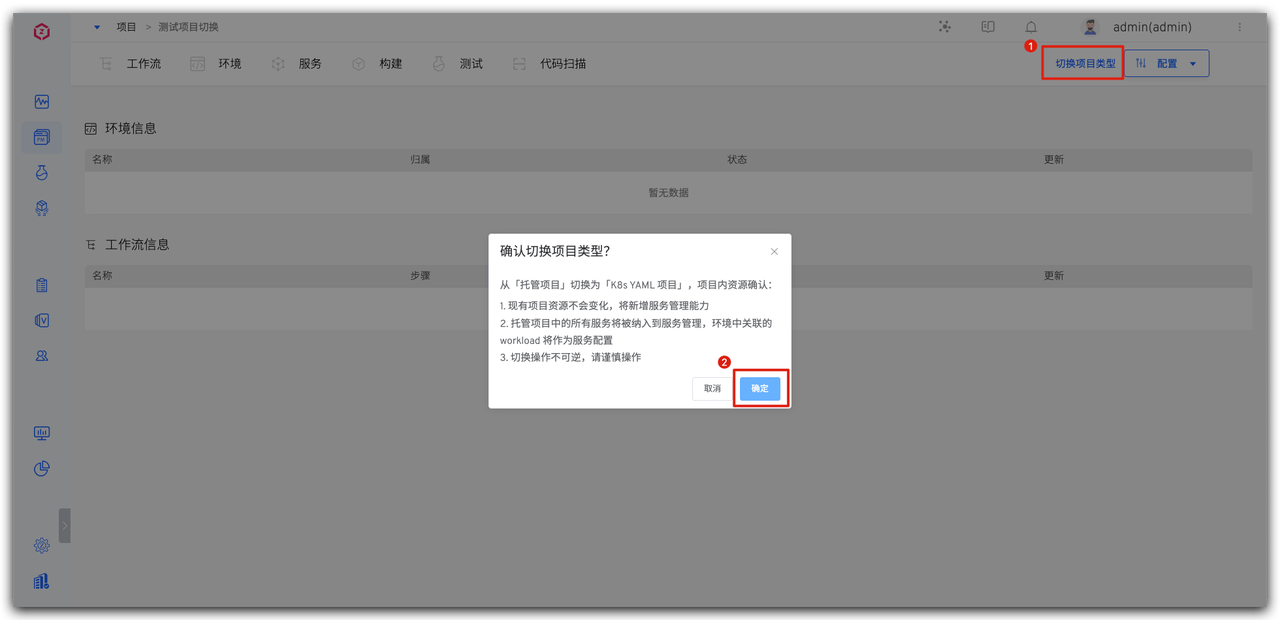
# Converting Hosting Projects to K8s YAML Projects
Users can switch existing hosting projects to K8s YAML projects with one click as needed.
Enter the corresponding hosting project, click Switch Project Type, complete the project type switch.
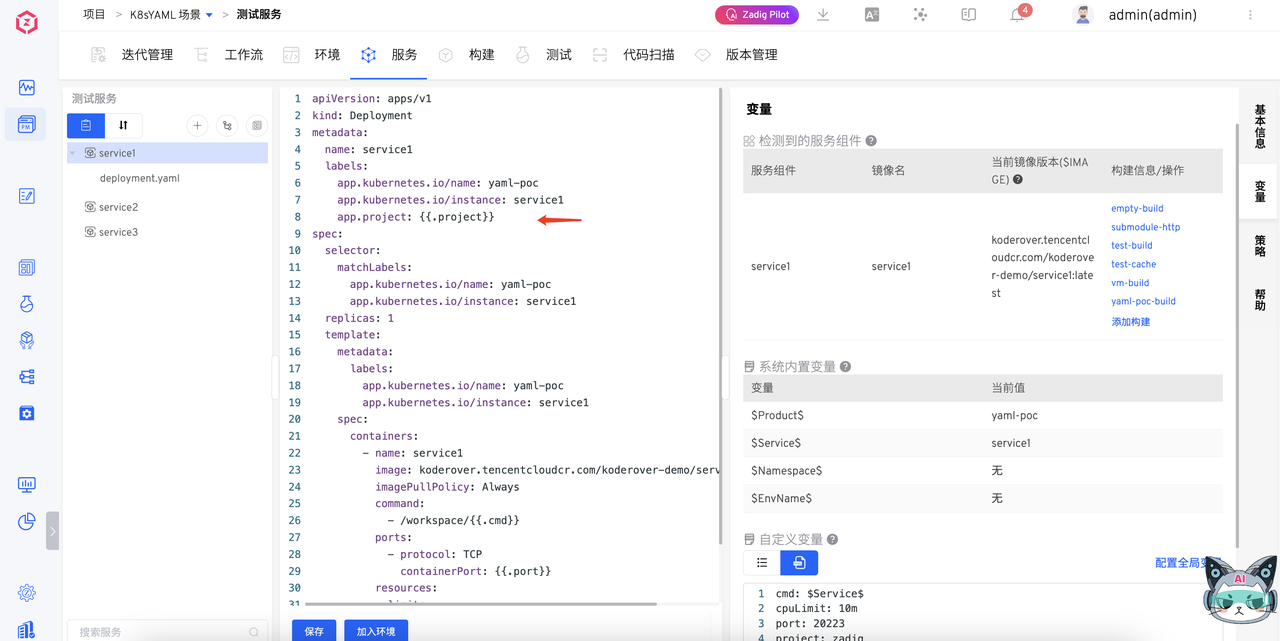
# Organize Service Configuration
Paste service templates from CODING to achieve multi-environment sharing of one service configuration, simplifying subsequent operational costs.
Advanced configuration:
- K8s YAML configuration management: Zadig Simplifies K8s YAML Configuration Management, Achieving Automated Operations for Thousands of Microservices | KodeRover | Blog (opens new window)
- K8s YAML multi-environment configuration: Revealing Zadig Multi-Environment Configuration Best Practices - K8s YAML Edition | KodeRover | Blog (opens new window)
# Summary
As more migration users continue to join, we will continuously collect feedback and supplement scenario details to make the guide content more aligned with actual needs — the problems you encounter during migration and the techniques you summarize may become important references for guide iteration.
Finally, we sincerely wish every user a smooth migration, quickly completing the smooth transition from CODING to Zadig, and gaining a more efficient and flexible development experience in private deployment DevOps practices!